Create new form
Go to your WordPress admin and navigate to WP Contactor » New Form, then give your form a name. This name will be shown as title when you view your form directly.
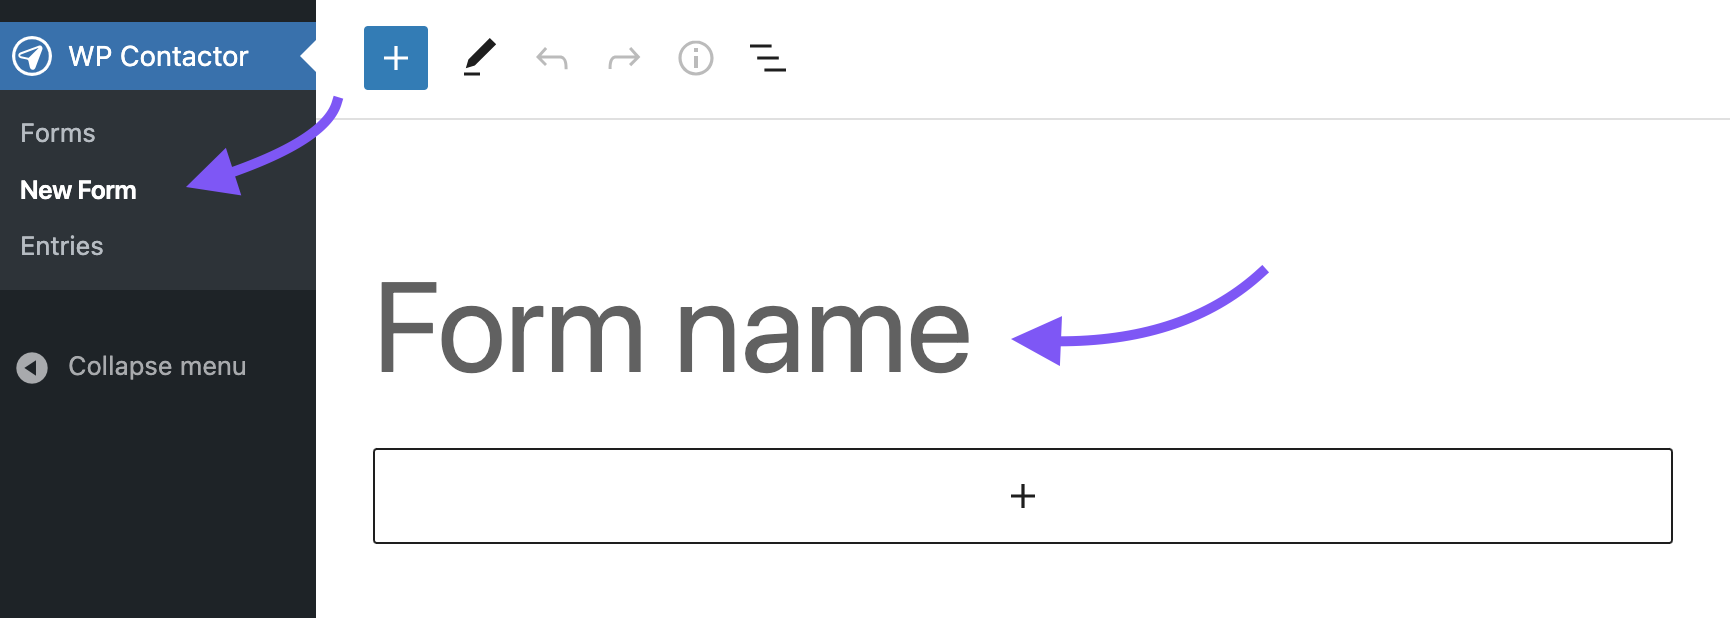
After you have entered a name, click on Publish button twice.

Add field to form
Go to WP Contactor » Forms and then click on the form you want to edit.

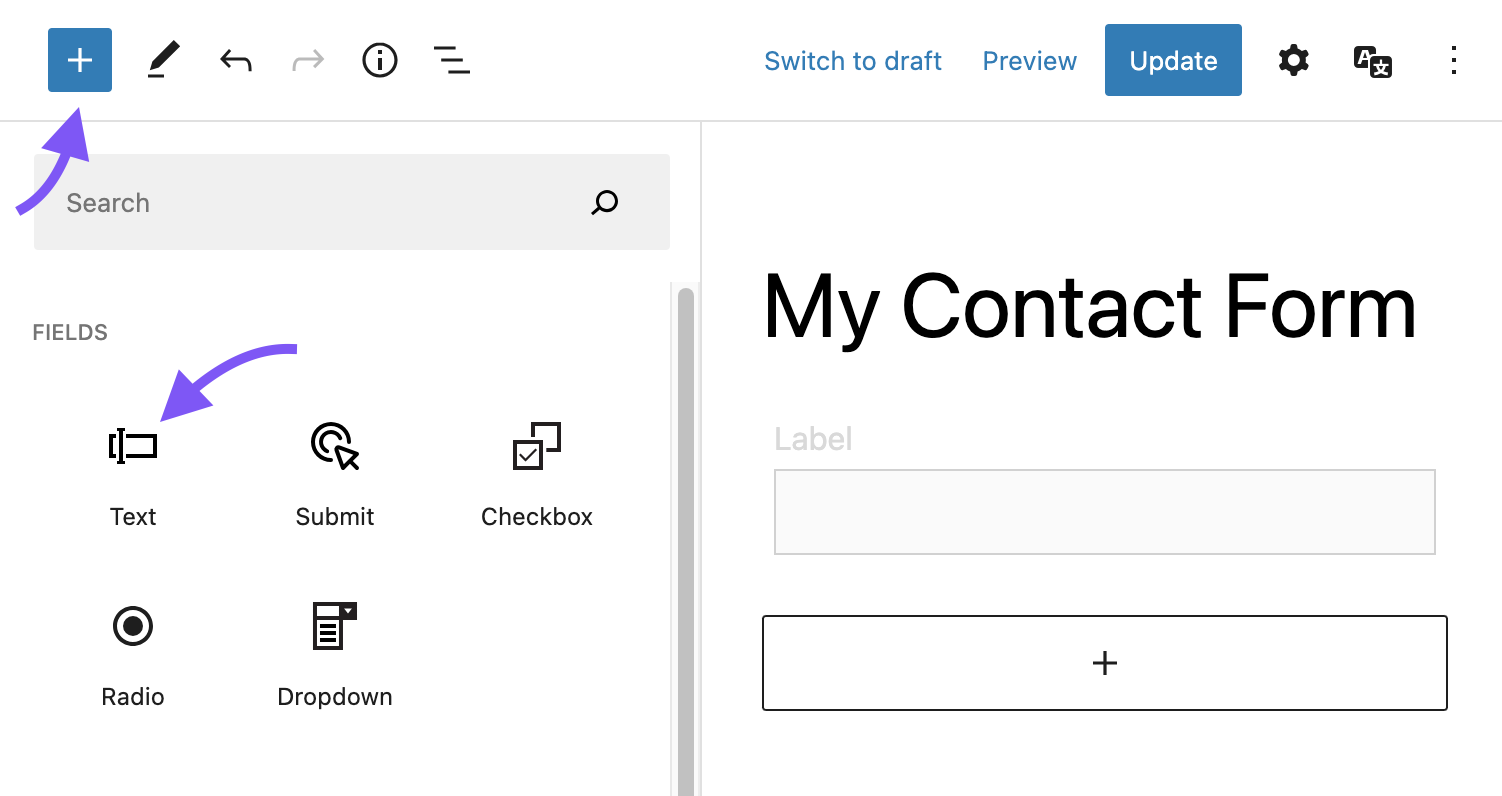
After you have opened your form, click on the plus icon to add a new field. Choose the type of field you want to add, then click on it e.g. Text field.
Edit field in form
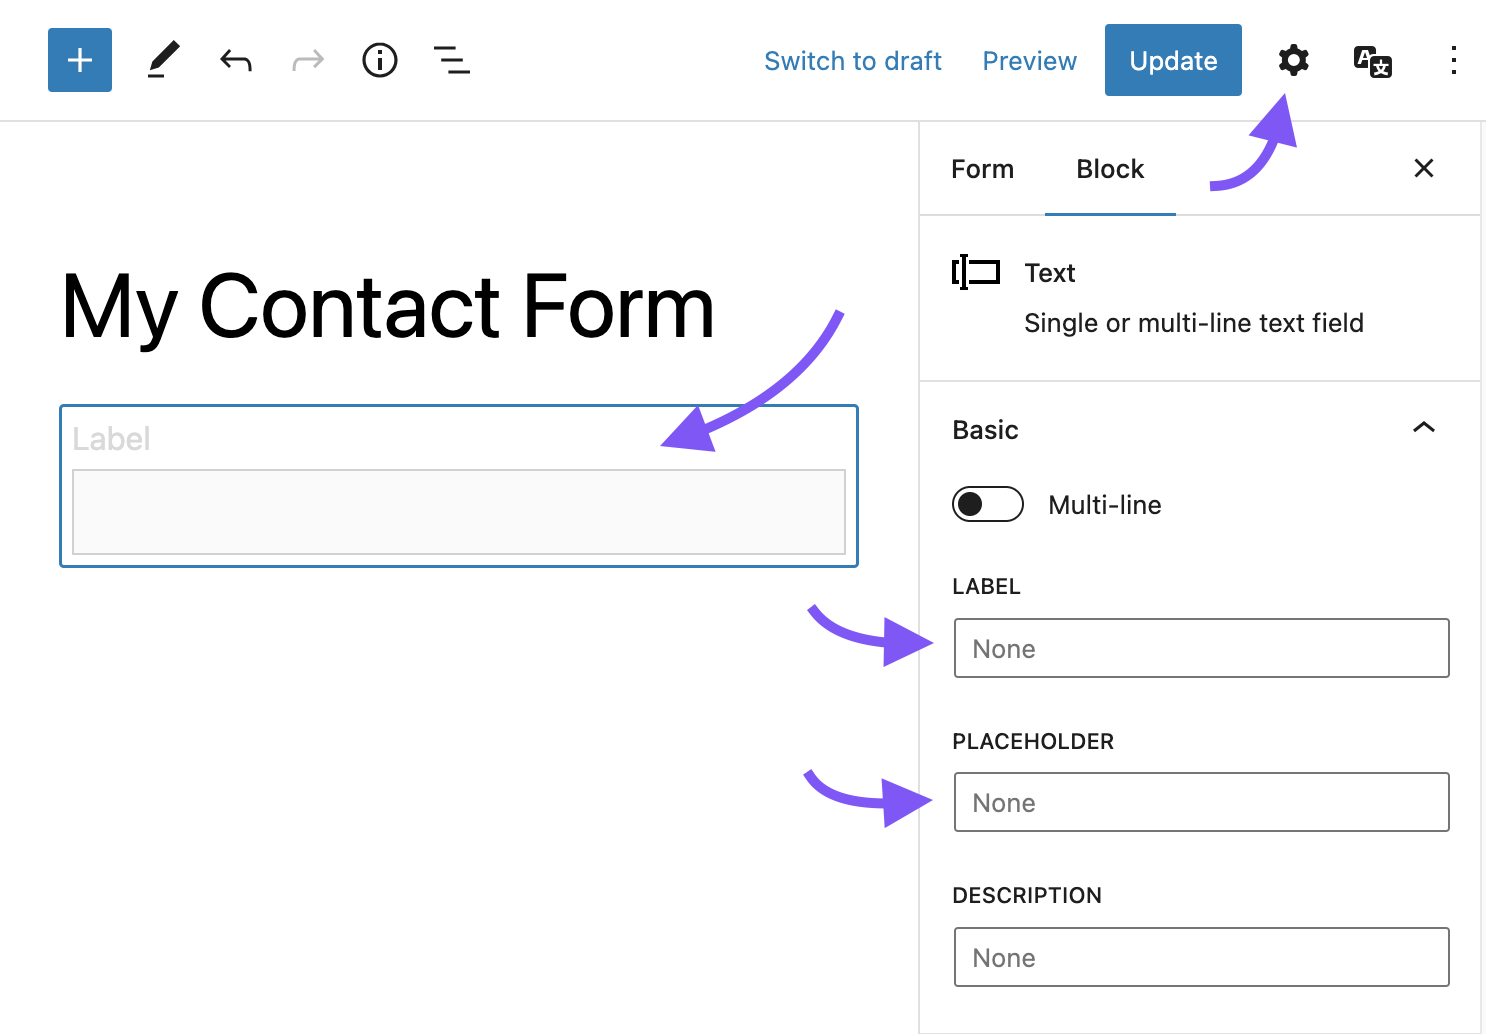
Click on the field you want to edit and then open Settings sidebar by clicking on cogwheel icon. Set a label and placeholder text for the field.You can also add some descriptive help text for the field.
When you are done with the changes, click on Update button to save your changes.
Add submit button to form
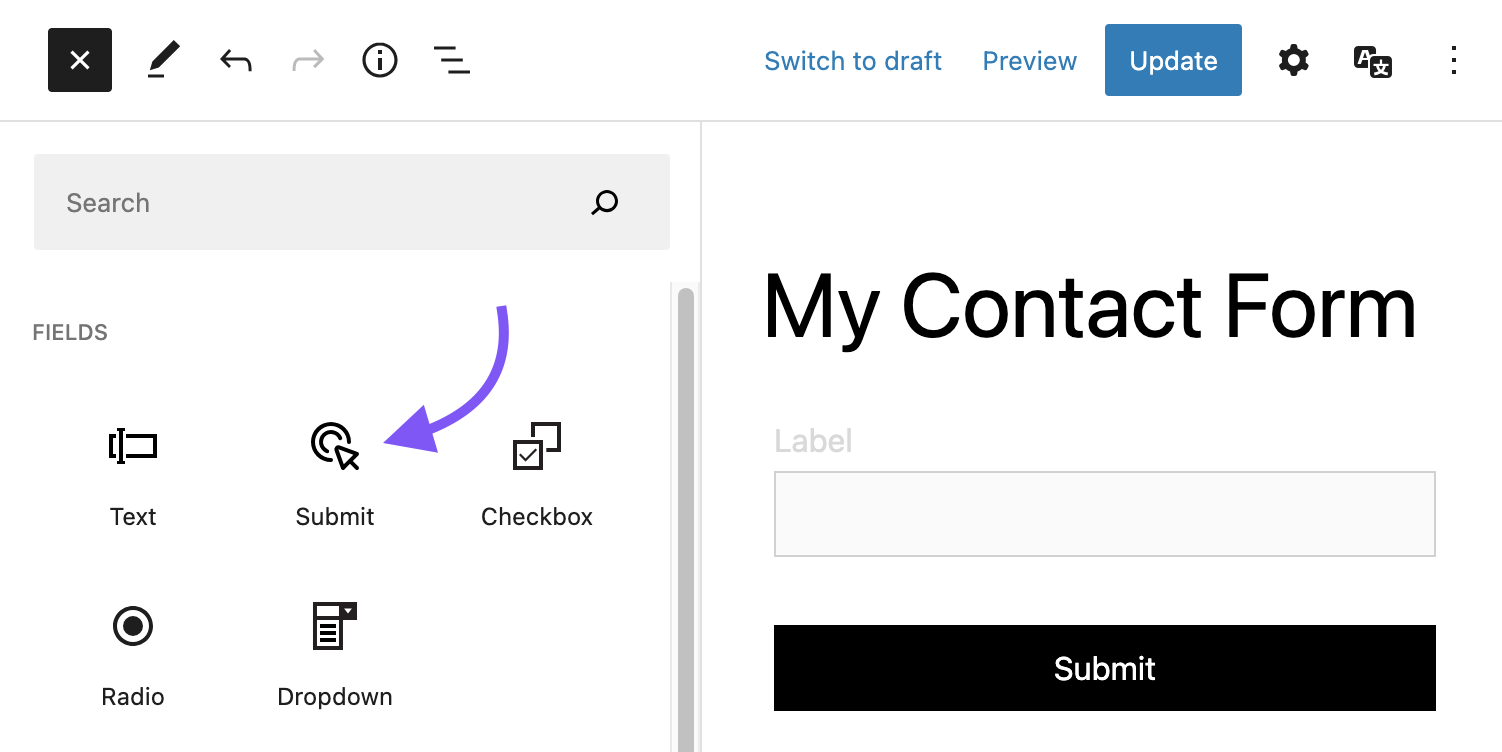
Make sure you also add a submit button to your form, otherwise users won't be able to submit your form. To add a submit button, follow the steps for Add Field, but select field type Submit.
View your form
Go to your WordPress admin and navigate to WP Contactor » Forms and click on View link to see your form.

You can also preview directly from block editor. Click on Preview » Preview in new tab to see your form.

Add form to page or post
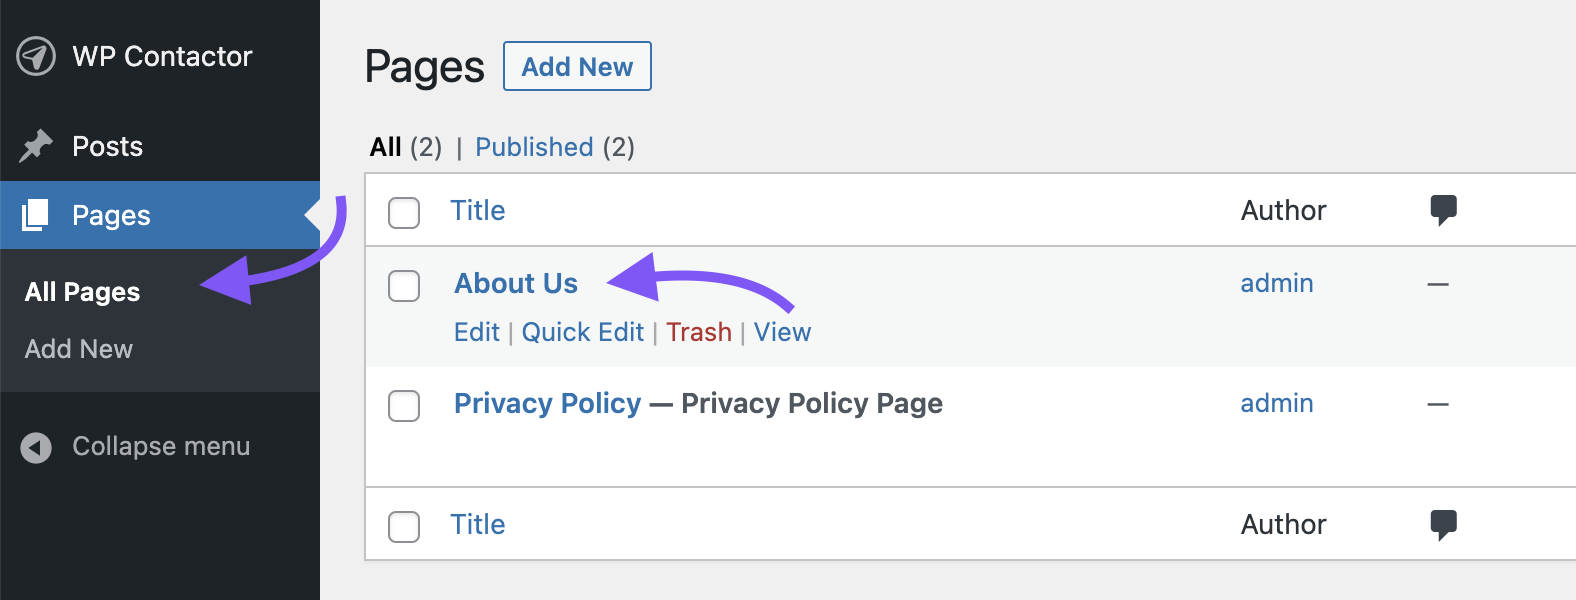
Go to your WordPress admin and navigate to Pages » All Pages and click on a page where you wan't to add your new form.
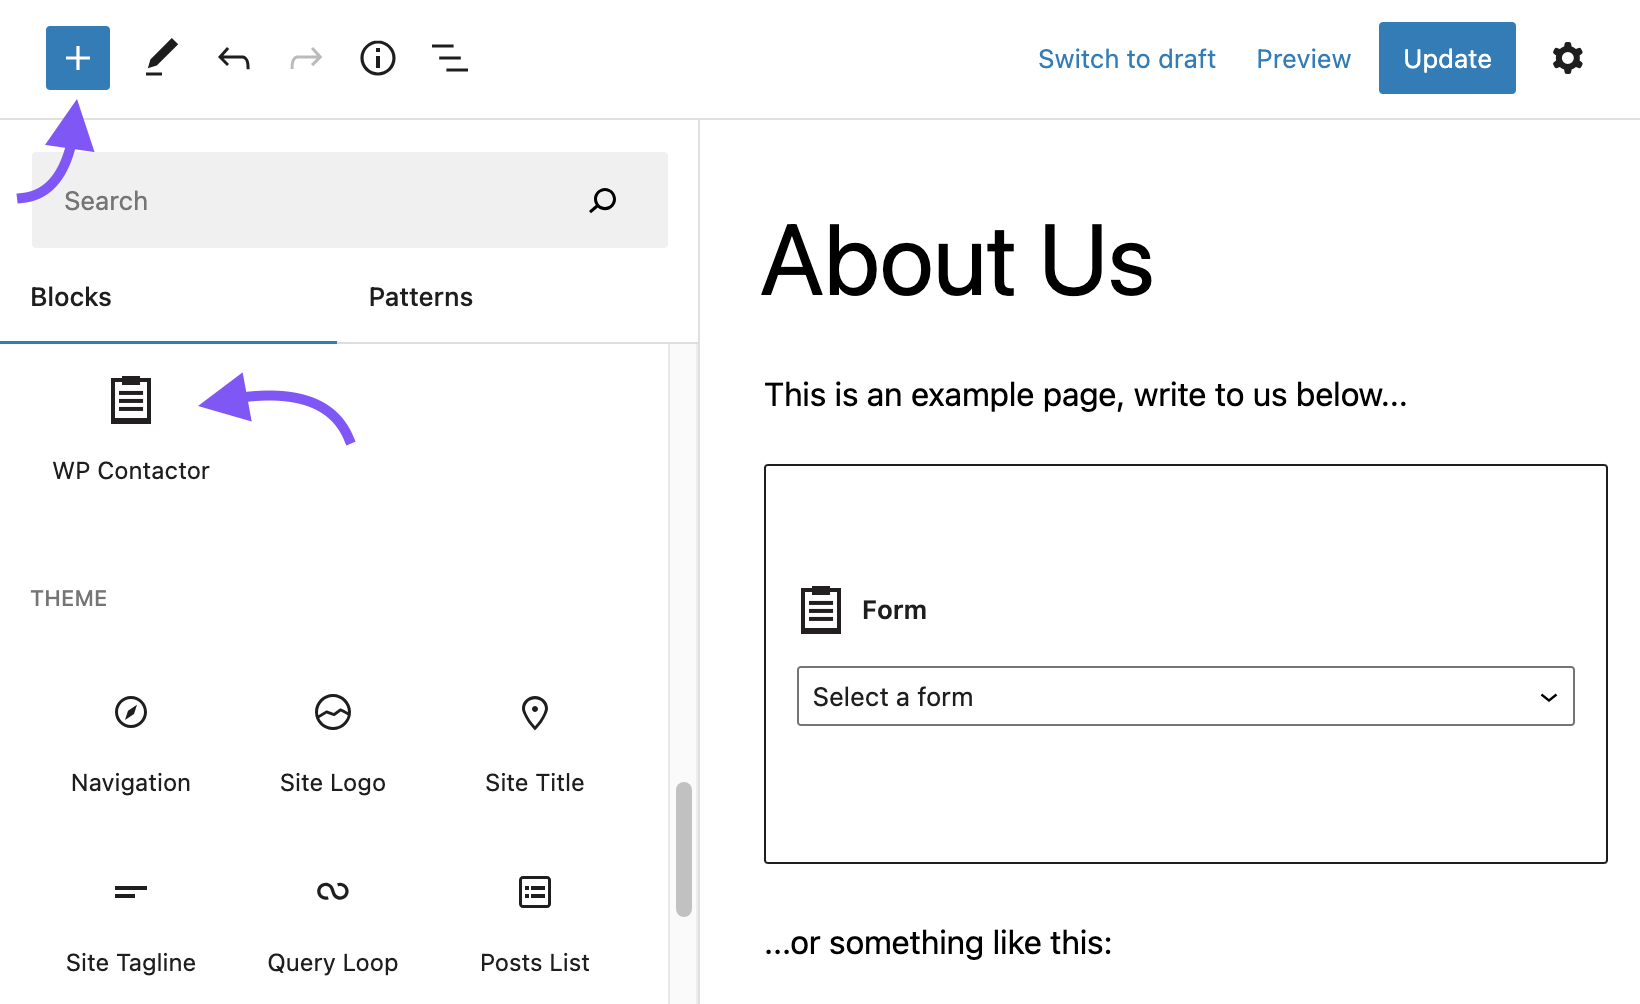
After you have opened your page, click on the plus icon to insert your newly created form. Find a block called WP Contactor under the category Widgets, then click on it.
When WP Contactor block have been added, click on Select a form dropdown to choose a form you wan't to show for your users.
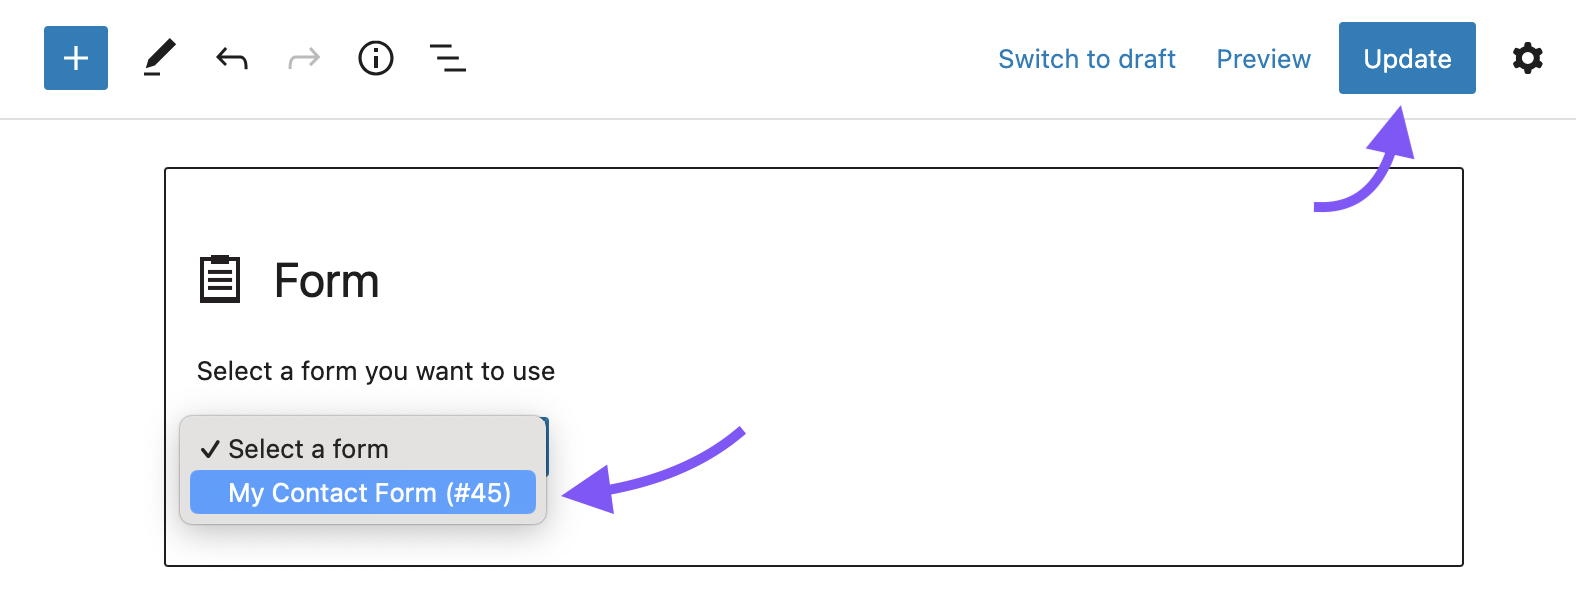
When you are done with the changes, click on Update button to save your changes.